
Imagine climbing onto your deck, where everything feels like an extension of your home. The right decking materials, whether natural wood, composite, or PVC, bring style and strength.
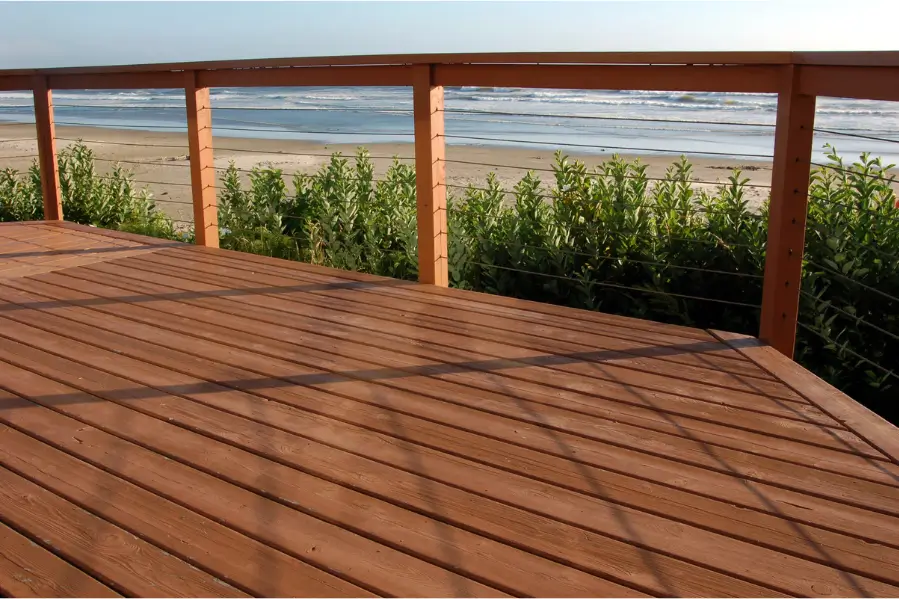
It makes your outdoor space look beautiful and durable but the real interest of the deck comes from the railing you choose. Whether you want to create a spectacular view or create a landscape, the right fencing can make your deck even more beautiful and feel more inviting.
In this article we will walk you through the steps of designing and building a railing that not only serves its purpose but adds personality and warmth to your street.
Let’s explore how the perfect railing can make your deck a place especially that you can enjoy.
Step-by-Step Guide to Build Deck Railing
Although it is most often associated with providing a safety feature for extending a deck, deck railing does much more than that.
Here are the step-by-step instructions of building deck railing, covering all the major points from planning and material selection to installation and finishing.
Step 1: Planning Your Deck Railing
A detailed plan of the requirements must be obtained before actual construction work commences. Consider:
Building Codes: Check to make sure the height of your railing and the space required between them is met in your building codes. The ideal height should be anywhere between 36 and 42 inches with a maximum of 4 inches in between the balusters.
Make and Style: You should consider what kind of makes would best complement your deck, especially your composite decking. This could be from the traditional wood railings, metal railings, cable railings, or glass panels.
Material to be used for the Railing: Select one which is sturdy and able to endure extreme weather conditions. Examples of these materials are pressure-treated wood, composite, or metal.
Step 2: Gathering Materials and Tools
Once you have a plan, gather the necessary materials and tools. Here’s what you’ll need:
Materials
- Railing posts
- Top and bottom rails
- Balusters or spindles
- Post caps
- Deck screws or bolts
- Wood glue (optional)
- Concrete mix (if installing posts in concrete)
- Paint or stain (if using wood)
Tools
- Tape measure
- Level or Clamps
- Drill and bits
- Circular saw or miter saw
- Carpenter’s square
- Post-hole digger (if setting posts in the ground)
- Paintbrush or sprayer
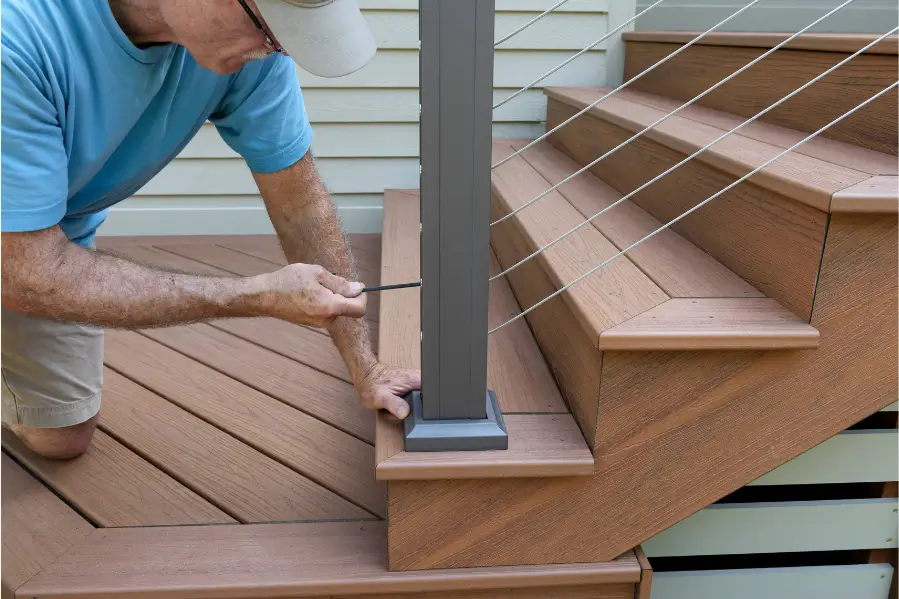
Step 3: Installing the Railing Posts
The first step in building your deck railing is to install the railing posts. These are the vertical supports that anchor the entire railing system.
Mark Post Locations: Measure and mark the locations for your railing posts, typically at the corners of the deck and intervals along the perimeter (usually no more than 6 feet apart).
Prepare the Posts: Cut your posts to the desired height, adding an extra 6 inches if they will be set in concrete. If mounting posts on the deck surface cut them to the exact height needed.
Step 4: Mounting Posts on the Deck Surface (if applicable)
Dig post holes at least 12 inches deep and 8 inches in diameter and then place the post in the hole. Align the post with the mark on the deck surface. Drill pilot holes and secure the post using deck screws or bolts. Pour in the concrete mix, ensuring the post is level and plumb. Allow the concrete to cure for at least 24 hours.
Step 5: Attaching the Top and Bottom Rails
The rails are those horizontal parts of your deck railing that join the posts to one another and support the balusters.
Measure and Cut Rails: Measure the distance between every pair of posts, followed by cutting the top and bottom rails to length.
Attach Bottom Rail: Place the bottom rail as desired in height, usually 2 to 4 inches off the deck surface, holding it with clamps. Make pilot holes and then screw the rail to the posts.
Attach Top Rail: Fasten the top rail on top of the posts, ensuring it is level concerning the bottom rail, screwing it into place.
Step 6: Installing Balusters or Spindles
The vertical members that fill the space between top and bottom rails are commonly called balusters or spindles.
Measure and Cut Balusters: Measure the height from top to bottom rail, then cut the balusters to the appropriate length.
Mark Baluster Spacing: Determine the baluster spacing, so that they are no farther apart than 4 inches; then mark their position on both top and bottom rails.
Attach Balusters: From one end, across the railing section, install each baluster with screws to the top and bottom rails. A level will help you make sure each baluster is plumb before tightening. For added protection from open areas, and a more finished appearance, consider using wood glue in addition to screws.
Step 7: Adding Post Caps and Finishing Touches
Post caps provide decor for your railing and keep the tops of posts from weathering. Choose post caps to match your railing style and secure to the tops of posts with adhesive or screws. Smooth all edges and surfaces as necessary.
Apply some form of weather-resistant stain or paint to the wood for the railing so as not to suffer through the element.
Readjust where needed, tightening screws or reapplying paint or finish. Allow the finish to dry before using the deck.
Inspection and Maintenance: Keep Your Deck in Top Shape
Post caps provide decor for your railing and keep the tops of posts from weathering. Choose post caps to match your railing style and secure to the tops of posts with adhesive or screws. Smooth all edges and surfaces as necessary.
Apply some form of weather-resistant stain or paint to the wood for the railing so as not to suffer through the element. Readjust where needed, tightening screws or reapplying paint or finish. Allow the finish to dry before using the deck.
Get Professional Help for your Deck Railing Project
If you are considering adding a deck to your home or updating an existing one, professional assistance can make all the difference.
For over 14 years, Smart Remodeling LLC has been a trusted name in Houston, supplying decks and high-quality home addition services for. With an in-depth understanding of the local climate and building codes, they specialize in outdoor spaces that are not only beautiful but built to last in.
You can seek their help because their reputation for a long time in Houston is a testament to their commitment to quality and customer satisfaction.
Conclusion
You will discover that enhancing both the safety and the appearance of your deck by building a deck railing is one of the more satisfying do-it-yourself projects that you can undertake. This comprehensive guide will help you construct a strong, durable, and elegant railing. To ensure that the finish is good every time, always ensure safety, compliance with local building regulations, and patience.
If you have basic carpentry skills, and the necessary tools, then you are capable of doing a deck rail installation by yourself. If you are hesitant that you will meet the safety codes, or have no experience, then it might be wise to hire a professional who can guarantee the railing to be correctly installed.
FAQs
Here are some frequently asked questions when building deck railing:
1. What is the normal height for deck railing?
The standard heights for deck railing vary by code, but for the most part, they are between 36″ and 42″. Always be sure to check your local regulations.
2. What kind of wood is best used for deck railing?
Pressure-treated wood is often used in deck railing in situations where resistance to rot and insects is called for. Other uses include cedar and redwood, which exhibit natural beauty and durability.
3. Can I use composite materials for deck railing?
Yes, composite materials rank among the most popular deck railing choices because of their durability, low maintenance, and weather resistance. They are available in a wide color and style range to match your deck.
4. Irregular Surfaces—How to Install Deck Railing?
You would want adjustable brackets for the rails when working with uneven surfaces, or you might need to cut the balusters to a matching angle for sloped decks and steps. Together with exact measurements taken ahead and a level, this will ensure that your railing is even and secure.
5. What’s a post cap, and do I need one?
Basically, post caps are decorative pieces mounted above the railing posts. They are not compulsory, but they give a good finished look and protect the tops from moisture, which eventually prolongs your railing’s lifetime.