
Ceiling cracks are a common issue in both new and old homes. They often become a concern for many homeowners. Multiple factors contribute to this problem, including the settling of the building and stress points within the structure.
Whether these cracks are caused by natural wear and tear or construction flaws, these unsightly cracks can make a room look neglected and hint at underlying issues that need attention. But don’t worry. Fixing ceiling cracks is a task you can tackle yourself with a bit of guidance and the right tools.
In this comprehensive guide, I’ll walk you through each step of the process, from understanding what causes these cracks to gathering the necessary materials and executing a flawless repair.
Types of Ceiling Cracks
Before we jump into our topic, it’s essential to know what type of crack you are going to fix.
1. Hairline Cracks
Hairline cracks are fine, narrow cracks that often result from minor settling or shrinkage. They are typically less than 1/8 inch wide. These cracks can usually be repaired with simple patching techniques.
2. Straight Cracks
Straight cracks usually run along the seams of drywall panels. These cracks indicate issues with drywall installation, such as improper fastening or joint compound application. They often occur at the weakest points where two drywall sheets meet.
3. Spiderweb Cracks
Spiderweb cracks radiate out from a central point and looks like a spider’s web. These cracks can indicate more serious structural problems, such as foundation settling or significant movement in the home’s framework.
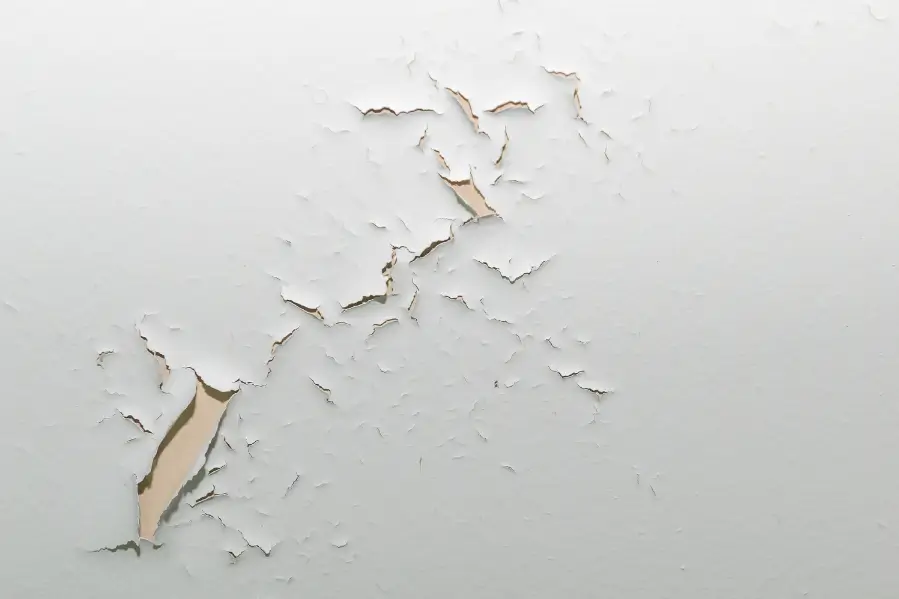
4. Discolored Cracks
Discolored cracks, often yellow or brown, are usually associated with water damage. These cracks can be caused by leaks from roofs, plumbing issues, or excessive humidity. It’s essential to address the underlying moisture problem before repairing the crack.
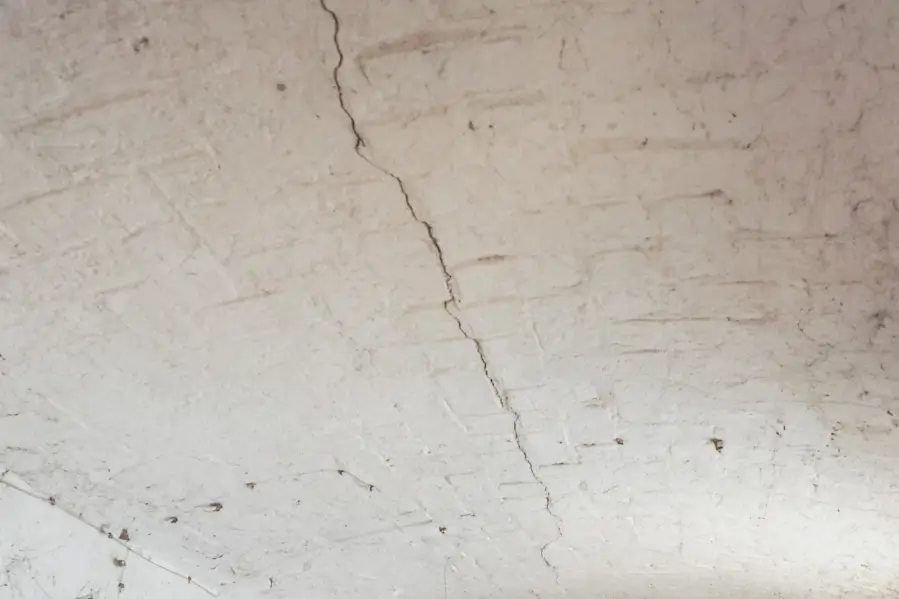
5. Step Cracks
Step cracks are common in ceilings that use masonry or brick. They follow the mortar joints in a step-like pattern and are often a sign of structural movement or settling in the foundation. These cracks may require a professional assessment to determine the cause and appropriate repair method.
How Do You Repair Cracks in a Ceiling: A Beginner Guide
Repairing cracks in a ceiling involves a systematic process that ensures a durable and seamless finish. Follow the below instructions to get a smooth ceiling again.
Project Overview
| Working Time | 2 to 4 Hours |
|---|---|
| Total Time | 1 to 2 days |
| Estimated Cost | $25 to $50 |
| Skill Level | Beginner |
Materials and Equipment Required
- Utility Knife
- Putty Knife
- Sandpaper
- Paintbrush or Roller
- Scraper
- Ladder
- Joint Compound or Plaster
- Drywall Tape
- Primer
- Paint
- Safety Gear
Step-by-Step Repair Guide
Follow these steps carefully. It will help you achieve a professional-looking repair.
Step 1: Ensure the Ceiling is Secure
First, check for stability. Push on both sides of the crack to ensure that the ceiling is secure. If the ceiling moves, it might indicate a loose nail or adhesive failure, which should be addressed before proceeding.
Step 2: Widen the Crack
Use a utility knife or a 7-in-1 tool to slightly widen the crack. This allows the joint compound to penetrate deeper and adhere better. It might seem like you’re making it worse. However, widening the crack actually ensures a more effective repair.
Step 3: Clean the Area
Remove loose material around the crack using a scraper.
Step 4: Apply Drywall Tape
Select either mesh tape or paper tape based on your preference.
- Mesh tape is often preferred for small repairs
- While paper tape is better for larger areas or new installations.
Pre-cut the tape to the length of the crack and place it over it, ensuring it is well-positioned.
Step 5: Apply Joint Compound
Apply a layer of joint compound into the widened crack and over the tape. Ensure the compound is evenly spread and covers the tape completely.
Create a bedding layer under the tape by applying the joint compound at an angle. Press the tape into the compound, making sure it is well-embedded and doesn’t move.
Use a putty knife to smooth the compound over the tape. The first coat doesn’t need to be perfect; focus on embedding the tape.
Step 6: Let the First Coat Dry
Allow the first coat to dry completely. This might take a few hours to overnight, depending on the compound used and environmental conditions.
Step 7: Apply Additional Coats
Apply a second layer of joint compound. Spread it wider than the first to blend it into the ceiling. Smooth the edges to make it look seamless. If it still isn’t smooth enough, add a thin third layer to perfect the finish.
Step 8: Sanding and Finishing
Once the final coat is dry, lightly sand the area to remove any high spots or imperfections. Use fine-grit sandpaper for a smooth finish. Wipe down the area to remove any dust from the sanding.
Step 9: Prime and Paint
Apply a coat of primer to the repaired area to prepare it for painting. Once the primer is dry, apply two coats of ceiling paint, blending it into the surrounding area.
Common Causes of Ceiling Cracks
Ceiling cracks can develop due to various factors. Let’s discuss each factor in detail.
1. Structural Movement
Ceiling cracks can often be attributed to structural movement. Over time, all buildings naturally settle, causing minor shifts that can lead to ceiling cracks. Additionally, seasonal temperature changes cause expansion and contraction in building materials, which can also stress the ceiling and result in cracking.
2. Poor Construction
Poor construction practices are another common cause of ceiling cracks. If drywall is not correctly installed, cracks along seams and joints are more likely to develop. Furthermore, the use of substandard materials can lead to deterioration and cracking over time, as these materials are less durable and more likely to fail.
3. Water Damage
Water damage is a significant contributor to ceiling cracks. Leaking roofs allow water to penetrate the ceiling structure, weakening it and causing cracks to form. Plumbing issues, such as leaks, can also lead to moisture buildup, which similarly weakens the ceiling materials and results in cracks. Excessive humidity can exacerbate this problem by causing materials to expand and contract.
4. Environmental Factors
Environmental factors play a crucial role in the formation of ceiling cracks. Changes in humidity levels can cause materials to expand and contract, leading to stress and eventual cracking. Seismic activities, such as earthquakes or vibrations from nearby construction, can cause structural shifts that result in cracks. Additionally, heavy snow loads on the roof can put extra pressure on the ceiling, causing it to crack.
5. Aging and Wear
Aging and natural wear and tear are inevitable causes of ceiling cracks. Over time, materials degrade, and cracks can develop as part of the building’s aging process. As the foundation settles over time, it can cause stress and lead to cracks in the ceiling.
6. Improper Repairs
Improper repairs can also lead to ceiling cracks. Inadequate patching often fails to address the underlying issue, resulting in recurring cracks. Additionally, using incorrect materials for repairs can lead to ineffective fixes and future cracks.
How to Prevent Future Cracks?
To prevent future ceiling cracks, take the following proactive steps:
1. Regular Inspections
Regularly inspect your roof and plumbing systems for any signs of leaks or damage. Addressing these issues promptly so that it can prevent water from compromising your ceiling’s integrity.
2. Control Humidity Levels
Use dehumidifiers in high-humidity areas to maintain stable moisture levels. Ensure there is proper ventilation in bathrooms and kitchens to reduce humidity.
3. Invest in High-Quality Materials
Additionally, investing in high-quality materials is crucial. Opt for durable drywall and premium joint compounds that offer greater longevity and resistance to cracking.
4. Professional Installation
Hire professionals for drywall installation to ensure it is done correctly. Verify that all materials are properly installed to prevent future issues.
5. Timely Repairs
Address small cracks and leaks immediately to prevent them from becoming larger problems. Regularly maintain your ceiling by repainting and patching up minor imperfections.
When to Seek Professional Help
Fixing small ceiling cracks can be a DIY project, but some situations need professional help. If you see large or multiple cracks, sagging areas, or water stains, it’s a sign of bigger problems that need expert attention. Issues like serious water damage or structural problems are too complex for DIY fixes.
In these cases, calling Smart Remodeling LLC is a smart choice. Based in Houston and with 16 years of experience, Smart Remodeling LLC offers top-notch home and commercial remodeling services. Their team of experts can find the root cause of the problem and fix it properly. With their extensive experience and dedication to quality, they will ensure your ceiling looks great and is safe and secure.
Conclusion
Ceiling cracks, though common, should not be ignored. By understanding their causes, assessing their severity, and following proper repair techniques, you can maintain the integrity and appearance of your home. Regular inspections and maintenance will also help prevent future issues, ensuring your ceiling remains crack-free.