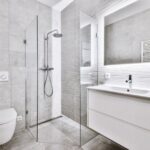

Bathrooms, by their very nature, are prone to high humidity and moisture buildup, especially after a hot shower or bath. Without proper ventilation, this excess moisture can create an ideal breeding ground for mold and mildew. This will ultimately damage walls, ceilings, and even your health.
One of the easiest ways to improve bathroom ventilation and reduce moisture is by installing an exhaust fan. A correctly installed exhaust fan can help keep your bathroom fresh, reduce odors, and it may even protect your walls.
In this guide, we’ll walk you through the process of choosing and installing a bathroom exhaust fan with step-by-step instructions, tips, and tricks. So let’s begin.
Material & Tools You’ll Need To Install Exhaust Fan
You will need all these tools and materials. This can help simplify your setup experience and save you from multiple trips to store for more tools.
Here’s what you’ll need:
- Exhaust fan kit
- Screwdrivers
- Drill with bits
- Reciprocating saw
- Measuring tape
- Ladder
- Wire strippers
- Wire nuts
- Electrical tape
- Duct tape
- Pry bar or hammer
- Utility knife
- Circuit tester
- Flexible ducting
- Safety glasses and gloves
Step-by-Step Installation Guide
Here is a step by step guide to install an exhaust fan in your bathroom.
Step 1: Choose a Right Exhaust Fan for Your Bathroom
Selecting the best exhaust fan for your bathroom is a key step in providing effective ventilation and proper moisture management. There are numerous models on the market, so it is important to simply choose one that suits your bathroom in terms of size and offers ailment-specific benefits.
- First analyze the fan’s performance, rated in cubic feet per minute.
- This rating describes the amount of air a fan can move.
- Generally you should choose a bathroom ventilation fan with this top-rated per square foot of your bathroom.
Step 2: Select the Location and Power Off the Supply
The location is the key and it should always be determined to get fresh air easily. Ideally, the fan should be placed on the ceiling and as near to your shower or bathtub where moisture is at its highest possible level.
However, it should also be out of the direct range of any air conditioning vents to avoid airflow short circuiting.
- Check for studs using a stud finder so you do not mistakenly cut into them.
- Using a pencil, mark the location you select making sure there will be sufficient room in your ceiling for fan housing.
- Safety is paramount. The first thing you have to do before doing any electrical work.Here is the idea of turning off bathroom power from the main circuit breaker.
- Apply a circuit tester to be sure that the power is completely off by testing each of the wires in your wall or light switch next to an existing fan.
Step 3: Install the Fan Housing and Connect the Ductwork
Screw in the fan housing using four screws. There are adjustable brackets that come with most exhaust fans and mount to the ceiling joists.
- Align the vent outlet with your ducting path, and plug in it.
- Use screws to attach the brackets into the joists.
- Check the housing to make sure it is securely mounted and leaves enough clearance for its blades.
- Then, connect the flex duct to your inline fan outlet.
- Wrap it with duct tape and secure it in place well, so the air will not escape from there.
- Direct the ducting onto an existing roof or wall vent.
- This inlet should be limited to a short and straight track in order that airflow can move resistance from it.
Step 4: Wire It Up and Attach the Fan Motor and Grill Body
When you have mounted the fan housing, it is time to wire up. Typically, a 120-volt circuit like you have in the bathroom. If there is an available circuit, you will be able to wire the new fan into it; if not, then a new connection may have to be put in which requires electrician services.
- Seal all the connections with wire nuts and tape them securely for added safety.
- When the wiring is completed, connect the fan motor onto housing according to manufacturer specifications.
- The job of the motor is to slide in its housing and clicks or screws into place.
- Next, attach the fan grill.
- Almost all grills have spring clips that fit right into the housing. Make sure it is secure and flush against the ceiling.
- This not only gives the neat look of the fan but this will also make sure it works silently.
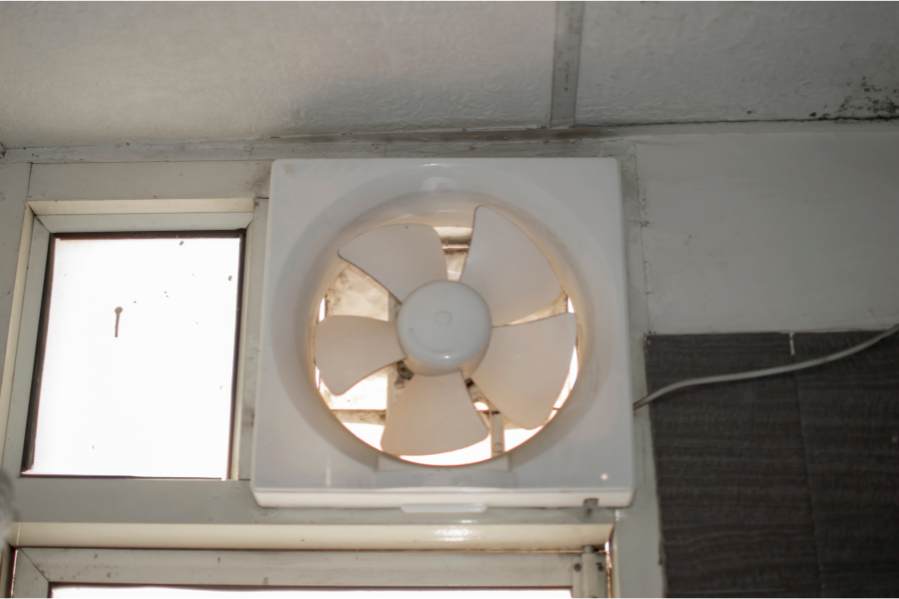
Step 5: Check if the Fan is Working Nicely
Return power to the circuit breaker. The fan should be quiet and not make it sound like a jet is about to land, which could constitute an installation mistake. Make sure that the fan is blowing air nicely outside by checking if you can feel airflow at the exterior vent running.
If the fan does not operate or there is no airflow, disconnect power and re-confirm wiring and ducting logic. Check for any obstructions in the ducting which can restrict air flow.
Step 6: Seal and Insulate and check Final Touches
Seal any gaps in the roof surface around the fan housing with caulk or expanding foam to increase energy efficiency and prevent heat loss.
For an upper-floor bath, use a hose clamp to secure the smooth wall vent pipe in location as it passes through the attic or roof(not applicable if you attach tubing).
Sweep up any leftover garbage from the install process, and then go ahead & stow away all your tools and materials. Now you can have a more comfortable, less moisture-filled bathroom with your exhaust fan working like new
Professional Bathroom Remodeling Services
Installing an exhaust fan is a great way to improve your bathroom. If you’re considering a more comprehensive bathroom upgrade, professional remodeling services might be the best option.
Smart Remodeling LLC can help you turn your old bathroom into a new, beautiful, and functional space. Our team can handle everything, from installing a new exhaust fan to completely redesigning your bathroom.
The company is based in Houston and has been serving for 14 years. We provide free estimates to help you plan a realistic budget for your project. Contact us today to start transforming your bathroom into the space you’ve always wanted.
Final Words
Putting in a bathroom exhaust fan is more than just an investment for the comfort and health of your home. Well-ventilated bathroom aggravates mold and mildew to grow, so well ventilated bathrooms can help reduce humidity which will prevent your walls from getting spoiled because of excess moisture.
These steps are intended to act as a roadmap for success when you decide it is time either do this job yourself or have someone else handle the work. Choose your fan, prepare the installation site and follow safe wiring for a pleasant mildew-free bathroom.
Now that you have swapped out the old for a new exhaust fan, breathe easy with the peace of mind that your bathroom is ready to provide you and your loved ones clean healthy air in the most humid conditions allowing rest assured quality will be maintained throughout life at home.